> ## Documentation Index
> Fetch the complete documentation index at: https://gcore-doc-1894.mintlify.site/llms.txt
> Use this file to discover all available pages before exploring further.
# Set a custom domain for CDN
export const Caution = ({children}) => {
return ;
};
A custom domain is a unique, branded domain name used for content delivery through a CDN. A website at `mywebsite.com` can configure a [CDN resource](/cdn/getting-started/create-a-cdn-resource/create-a-cdn-resource) for static content with the custom domain `cdn.mywebsite.com`. Static assets are then delivered with URLs like `cdn.mywebsite.com/sample.jpg`.
Any domain or subdomain for which DNS records can be edited is valid as a custom domain. For CNAME-based resources, a third-level domain is typical, e.g. `cdn.mywebsite.com`. For CDN resources using DNS delegation to Gcore, a second-level domain is used, e.g. `mywebsite.com`.
The custom domain cannot be changed after the CDN resource has been created. To use a different domain, add it as an [additional domain](#specify-additional-domains-only-for-static-cdn-resources). This option is only available for CDN resources for static content, not for CDN resources integrated with entire sites.
## Set a custom domain (for static CDN resources)
The instructions below apply to CNAME-based CDN resources. For CDN resources using DNS delegation to Gcore, the custom domain is set via nameserver change at the domain registrar — CDN resource creation covers both DNS delegation and CNAME-based setup.
1. During CDN resource creation, enter the domain or subdomain name in the **Add domain**\* section. To add multiple custom domains, click **Add CNAME**.
Multiple custom domains can only be added when creating a CDN resource for static assets. For CDN resources covering an entire site, adding additional custom domains is not supported.
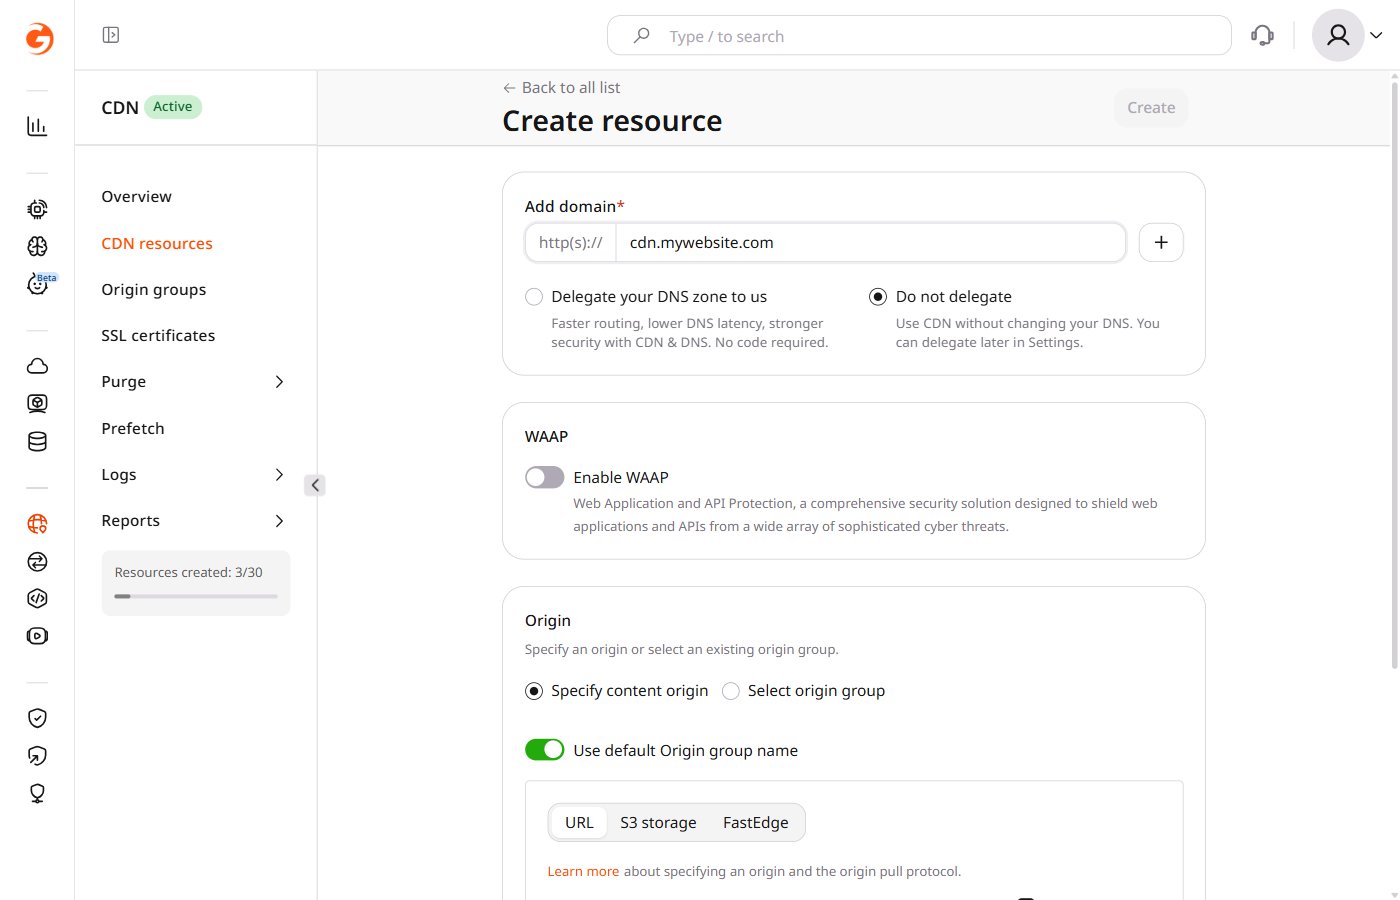 2. Click **Create**. The **Resource was created** page appears, showing the CNAME value assigned to the resource (formatted as `cl-XXXX.gcdn.co`) along with step-by-step DNS setup instructions and an example in BIND zone file format.
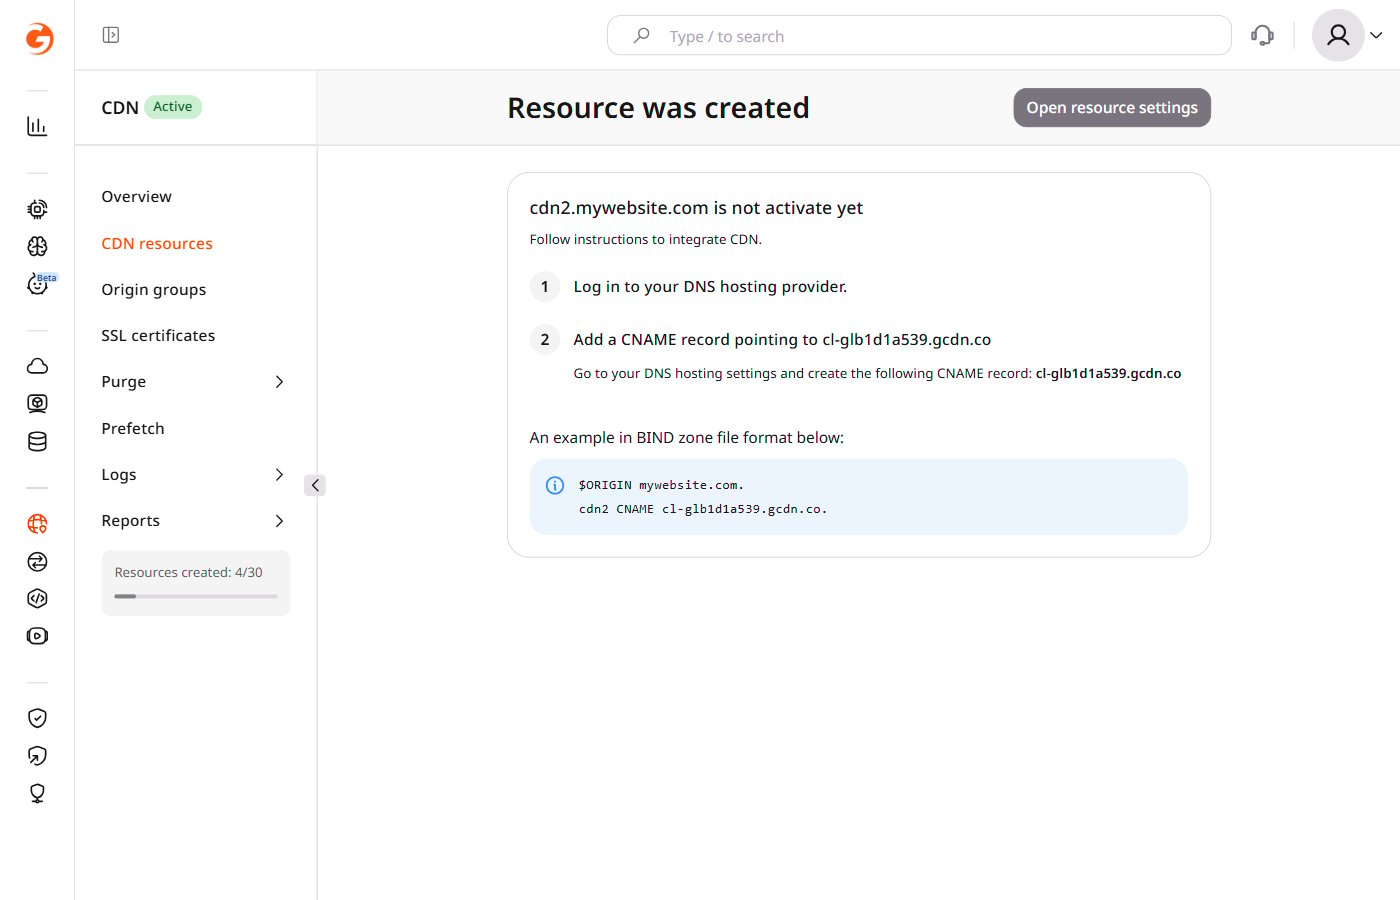 3. At the DNS provider's website, create a [CNAME record](https://gcore.com/learning/dns-cname-record-explained) for the custom domain pointing to the value shown on the **Resource was created** page:
```
cdn.mywebsite.com. cl-XXXX.gcdn.co
```
Replace `cl-XXXX.gcdn.co` with the value specific to the account.
If multiple custom domains were added in step 1, create CNAME records for all of them.
Verify the record with `dig` or the Gcore [DNS lookup](https://gcore.com/dev-tools/dns-lookup) tool.
## Check the DNS setup status
The Setup guide in resource settings verifies that the DNS configuration was completed successfully and identifies any issues.
1. Open the settings of the CDN resource.
2. Click **Setup guide**.
3. At the DNS provider's website, create a [CNAME record](https://gcore.com/learning/dns-cname-record-explained) for the custom domain pointing to the value shown on the **Resource was created** page:
```
cdn.mywebsite.com. cl-XXXX.gcdn.co
```
Replace `cl-XXXX.gcdn.co` with the value specific to the account.
If multiple custom domains were added in step 1, create CNAME records for all of them.
Verify the record with `dig` or the Gcore [DNS lookup](https://gcore.com/dev-tools/dns-lookup) tool.
## Check the DNS setup status
The Setup guide in resource settings verifies that the DNS configuration was completed successfully and identifies any issues.
1. Open the settings of the CDN resource.
2. Click **Setup guide**.
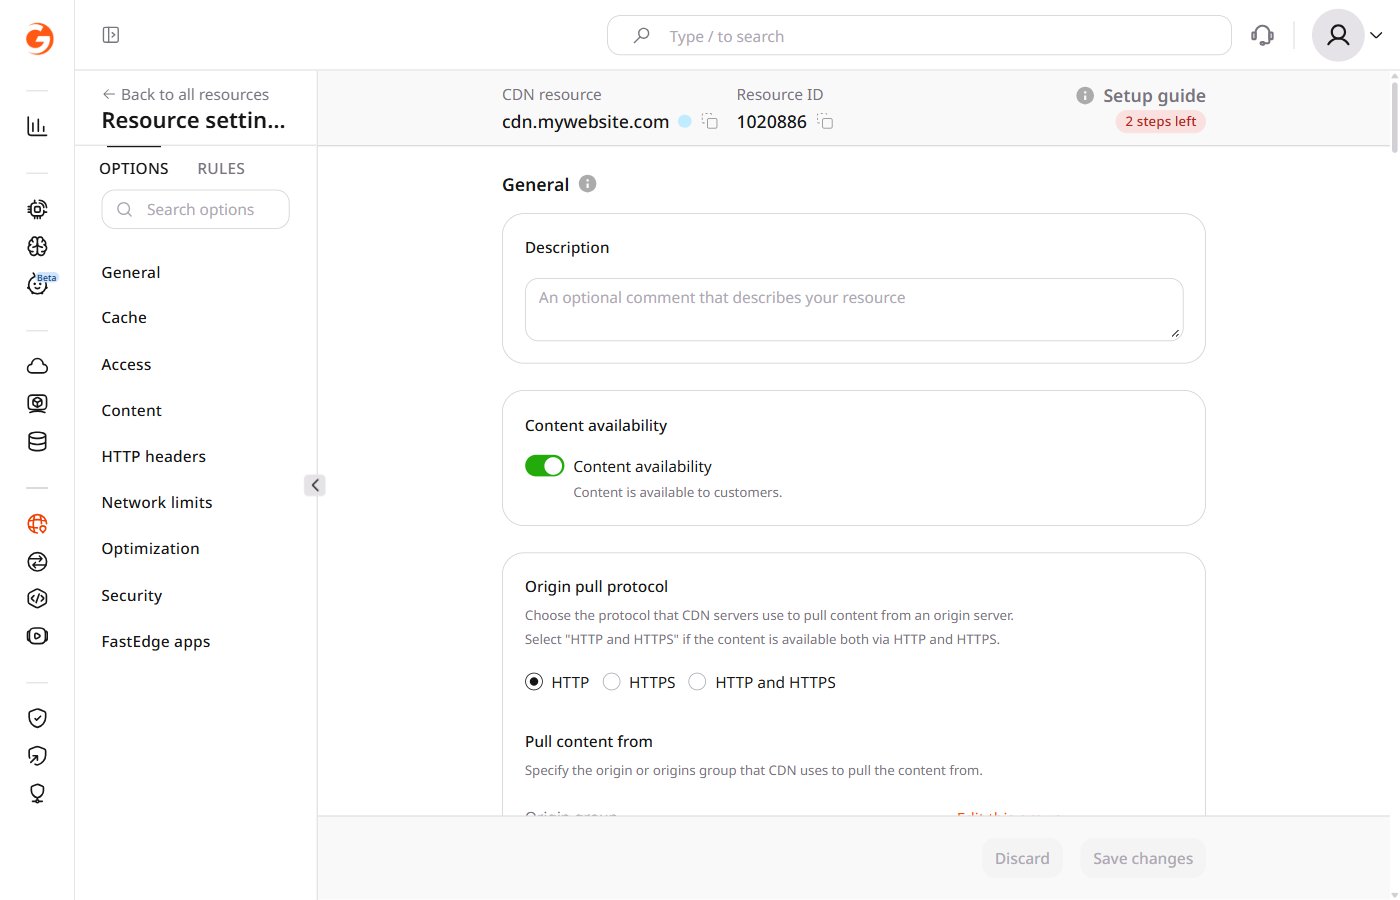 3. A 3-step wizard opens. Navigate to **Check DNS setup status** and click the button to run the DNS check.
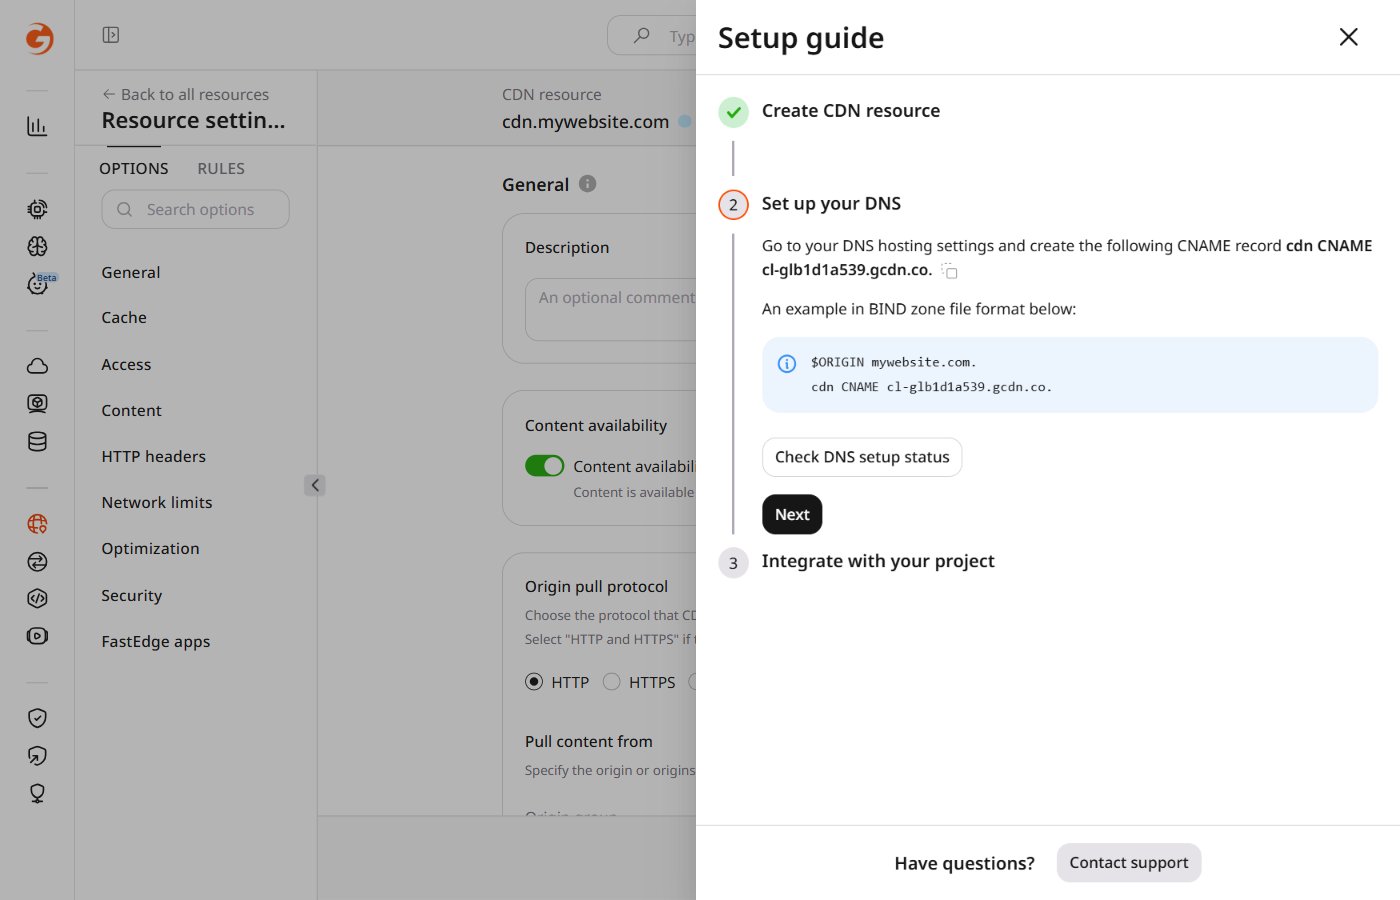 If the message "DNS record hasn't been set up" appears, check the DNS settings for configuration errors.
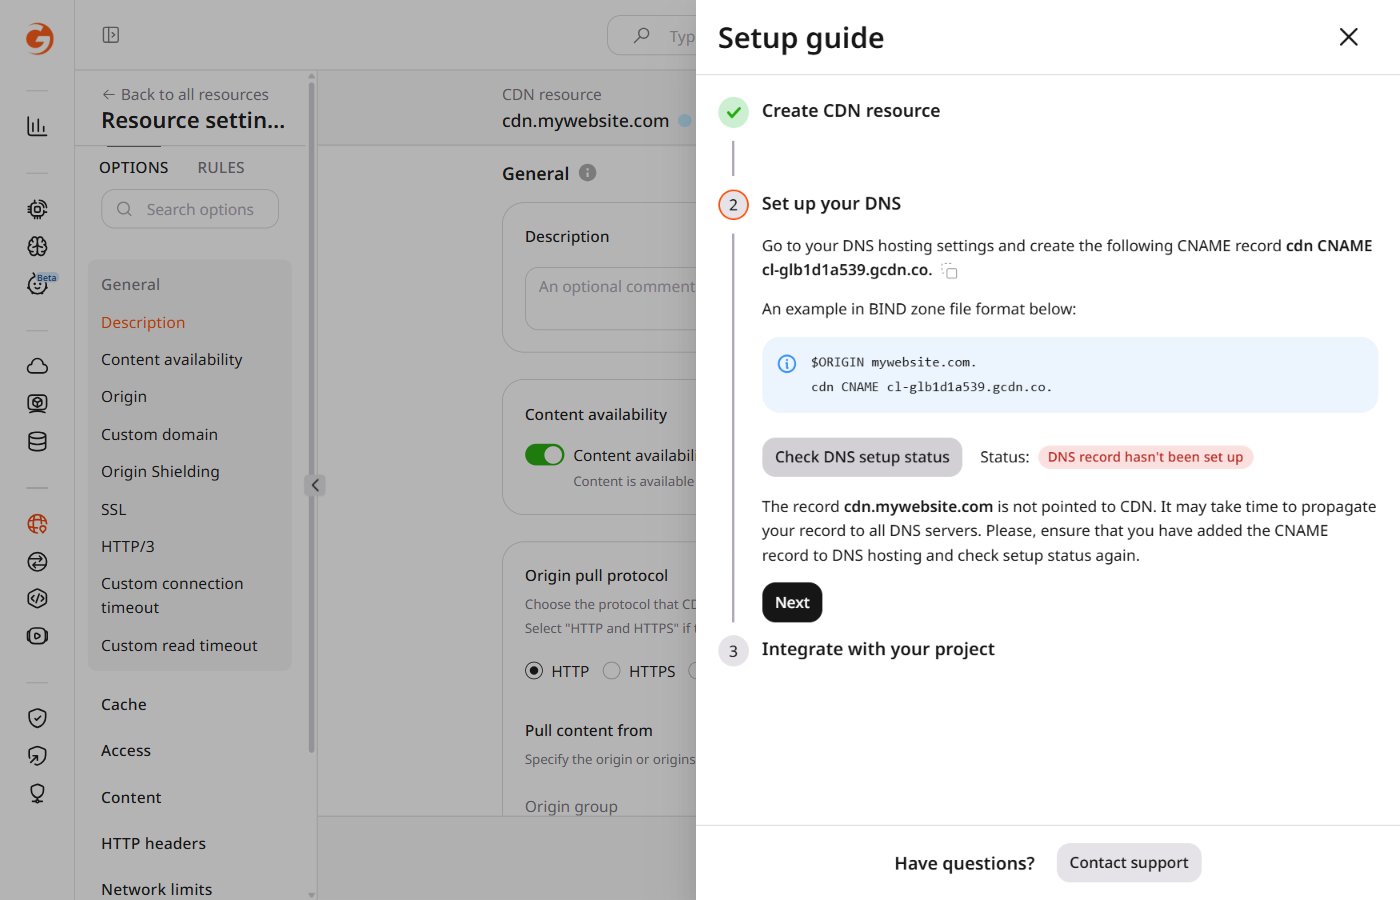 If "DNS record has been successfully set up" appears, the configuration is complete.
To verify the frontend of the integrated website, right-click any static file and select **Inspect**. This shows the content delivery URL from which the file is served.
## Specify additional domains (only for static CDN resources)
Additional custom domains can be added to an existing CDN resource at any time through the resource settings.
1. In the [CDN resource list](https://portal.gcore.com/cdn/resources/list), click the CNAME value of the resource to configure.
If "DNS record has been successfully set up" appears, the configuration is complete.
To verify the frontend of the integrated website, right-click any static file and select **Inspect**. This shows the content delivery URL from which the file is served.
## Specify additional domains (only for static CDN resources)
Additional custom domains can be added to an existing CDN resource at any time through the resource settings.
1. In the [CDN resource list](https://portal.gcore.com/cdn/resources/list), click the CNAME value of the resource to configure.
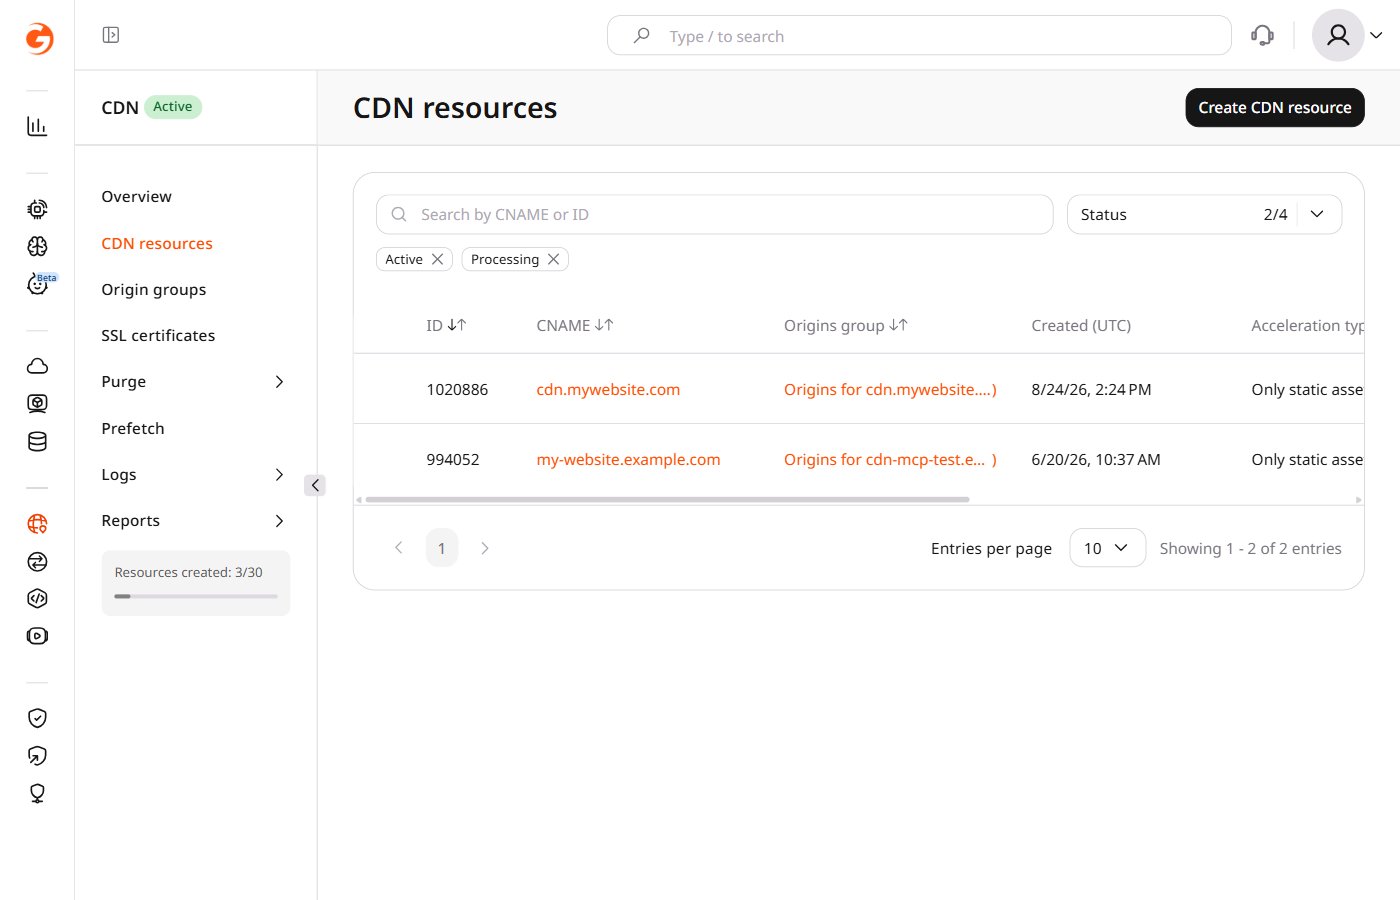 2. In the **Custom domain (to create a CNAME record)** section, click **+** and enter the domain name.
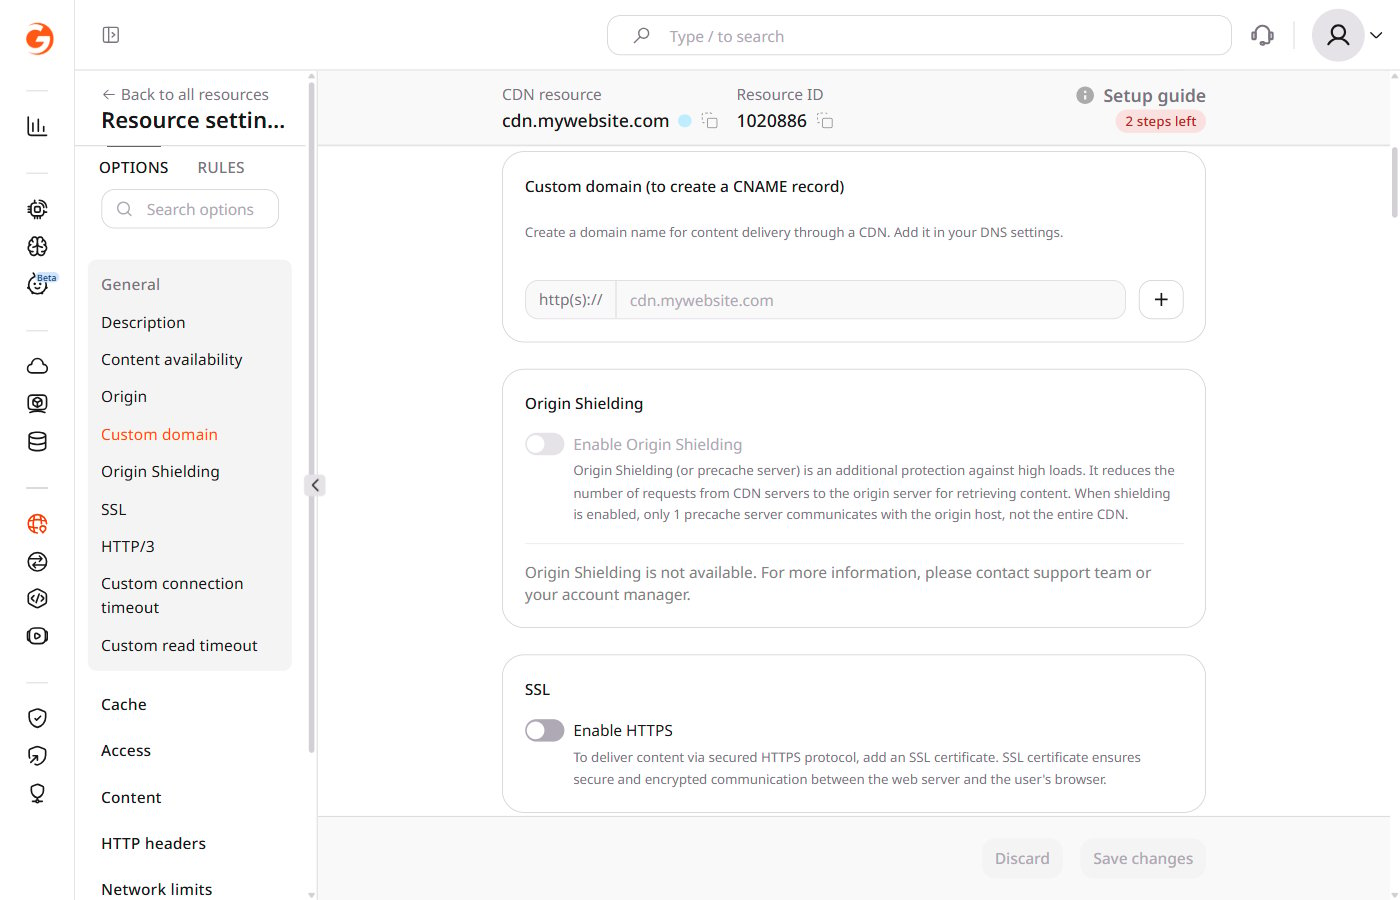 3. Click **Save changes** at the bottom of the page.
For each additional domain, create a CNAME record following the [instructions above](#set-a-custom-domain-for-static-cdn-resources).
Once the additional domains are set up, the website can deliver different types of static files from separate domains.
3. Click **Save changes** at the bottom of the page.
For each additional domain, create a CNAME record following the [instructions above](#set-a-custom-domain-for-static-cdn-resources).
Once the additional domains are set up, the website can deliver different types of static files from separate domains.