> ## Documentation Index
> Fetch the complete documentation index at: https://gcore-doc-1894.mintlify.site/llms.txt
> Use this file to discover all available pages before exploring further.
# Setup and configuration
Edge Proxy routes incoming traffic through Gcore's DDoS mitigation infrastructure and assigns a protected IP address that clients connect to instead of the origin server.
In the [Gcore Customer Portal](https://portal.gcore.com/), navigate to **Security → Edge Proxy → Protected servers** and click **Add server** to open the four-step wizard.
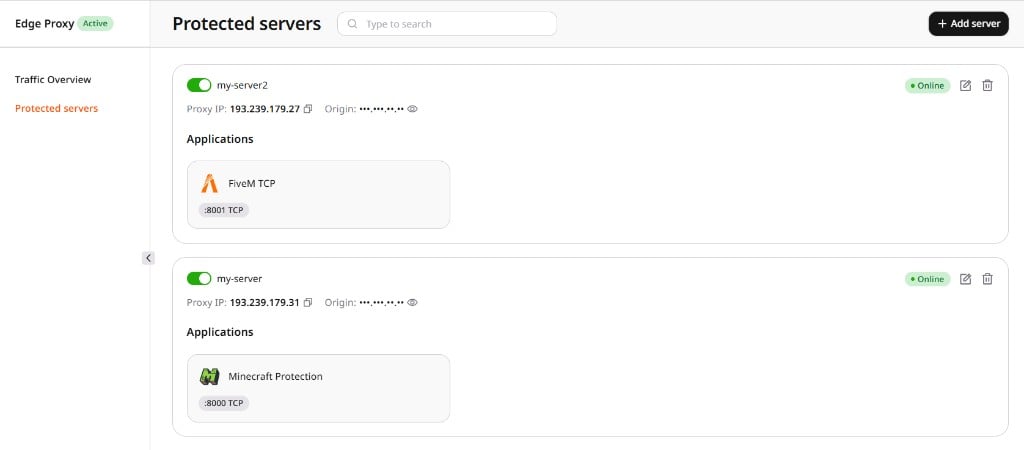 Fill in the fields:
* **Server name** — A display label for this server. Example: `my-game-server-1`.
* **Origin IP** — The origin server's public IPv4 address. Example: `195.14.50.0`. Clients connect to the proxy IP instead of this address.
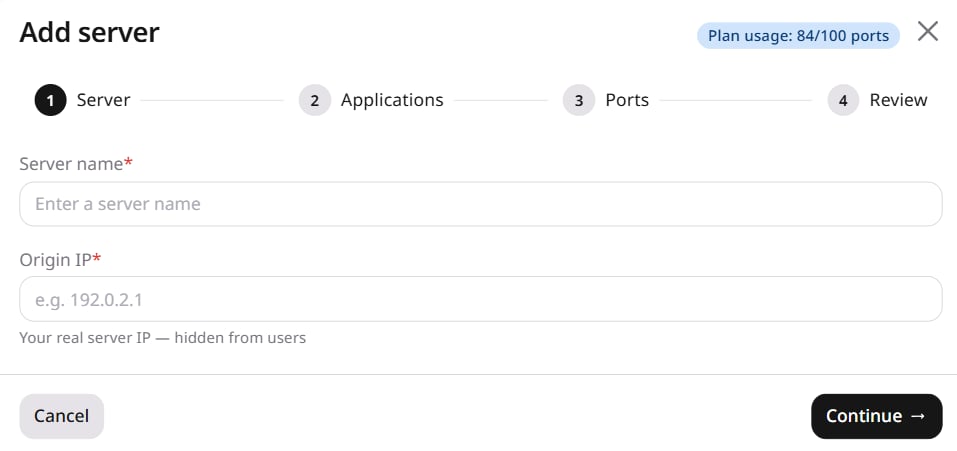
Fill in the fields:
* **Server name** — A display label for this server. Example: `my-game-server-1`.
* **Origin IP** — The origin server's public IPv4 address. Example: `195.14.50.0`. Clients connect to the proxy IP instead of this address.
 Click **Continue**.
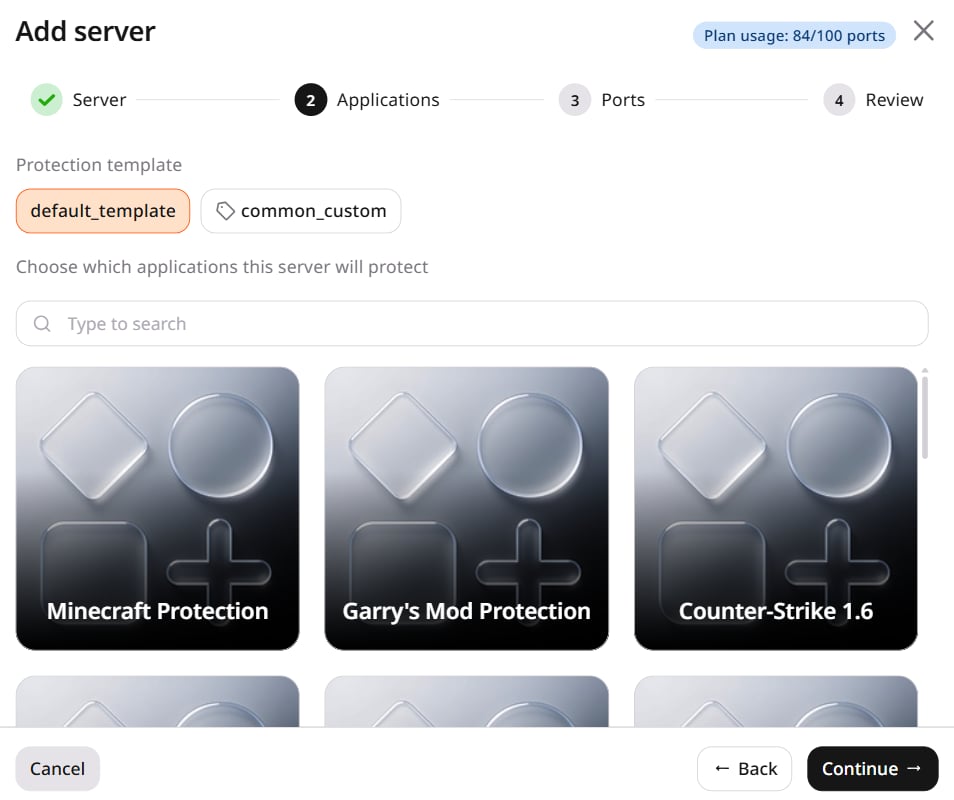
Select the protection template and the application types this server runs.
**Protection template** — determines which application profiles are available:
| Template | Description |
| ------------------ | --------------------------------------------------------------------------------------------------------------------------------------------------------------------------------------------------------------- |
| `default_template` | Standard preconfigured profiles for Minecraft, CS series (CS 1.6, CS:GO, CS2), Garry's Mod, FiveM, SA:MP, Rust, Teamspeak, Battlefield series, Unity Engine, Generic TCP Server, and General UDP Countermeasure |
| `common_custom` | Custom-tuned profiles for Minecraft, CS:GO, CS2, Rust, and a generic TCP server. Contact Gcore support to configure the parameters |
**Applications** — select each application type running on this server. Each entry corresponds to a DDoS filtering profile; the available options depend on the selected template.
The plan usage counter in the wizard header tracks how many ports are consumed across all servers against the plan limit.
Click **Continue**.
Select the protection template and the application types this server runs.
**Protection template** — determines which application profiles are available:
| Template | Description |
| ------------------ | --------------------------------------------------------------------------------------------------------------------------------------------------------------------------------------------------------------- |
| `default_template` | Standard preconfigured profiles for Minecraft, CS series (CS 1.6, CS:GO, CS2), Garry's Mod, FiveM, SA:MP, Rust, Teamspeak, Battlefield series, Unity Engine, Generic TCP Server, and General UDP Countermeasure |
| `common_custom` | Custom-tuned profiles for Minecraft, CS:GO, CS2, Rust, and a generic TCP server. Contact Gcore support to configure the parameters |
**Applications** — select each application type running on this server. Each entry corresponds to a DDoS filtering profile; the available options depend on the selected template.
The plan usage counter in the wizard header tracks how many ports are consumed across all servers against the plan limit.
 Click **Continue**.
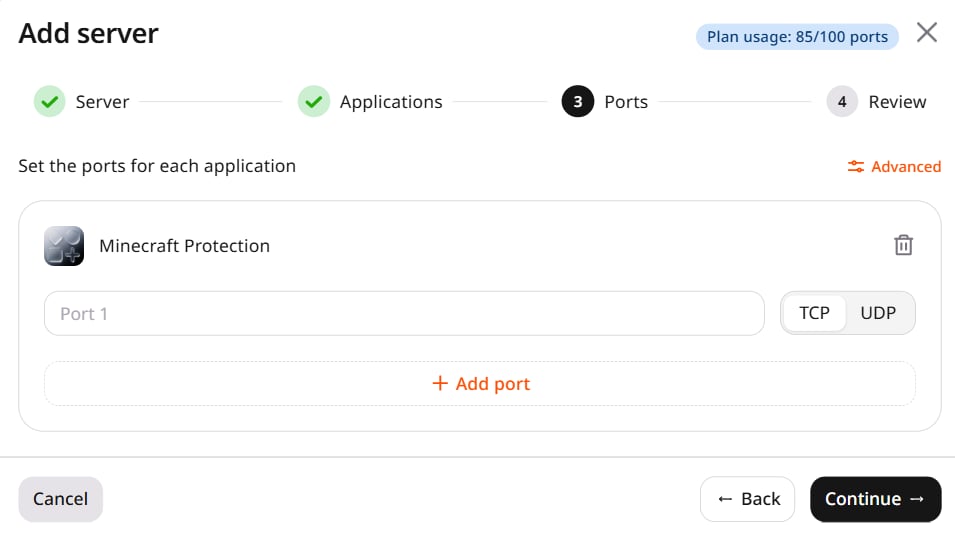
For each selected application, enter the listening port (1–65535) and select the protocol: **TCP** or **UDP**. Click **Add port** to add more ports.
Example: Minecraft Protection on port `25565`, protocol TCP.
Click **Continue**.
For each selected application, enter the listening port (1–65535) and select the protocol: **TCP** or **UDP**. Click **Add port** to add more ports.
Example: Minecraft Protection on port `25565`, protocol TCP.
 Click **Continue**.
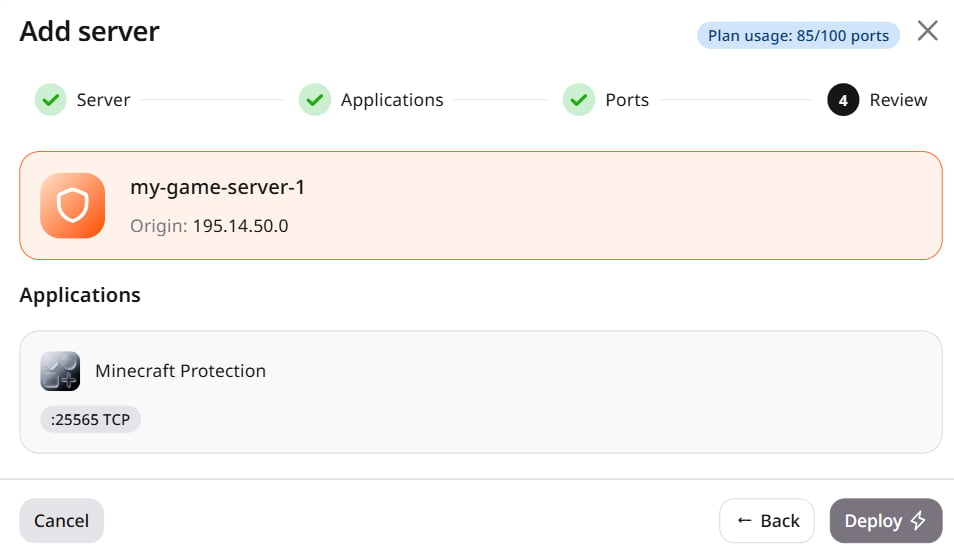
Review the configuration and click **Deploy**. Activation takes about 3 minutes. Once complete, the server appears in the Protected servers list with **Online** status and an assigned proxy IP.
Click **Continue**.
Review the configuration and click **Deploy**. Activation takes about 3 minutes. Once complete, the server appears in the Protected servers list with **Online** status and an assigned proxy IP.
 Copy the proxy IP and update the client to connect to it instead of the origin server address. If clients use a domain name, update its A record to point to the proxy IP.
If the application is unreachable after activation, most [activation issues](/edge-proxy/faqs-and-troubleshooting) trace back to firewall rules blocking Gcore edge IPs, incomplete DNS propagation, or a protocol mismatch.
Copy the proxy IP and update the client to connect to it instead of the origin server address. If clients use a domain name, update its A record to point to the proxy IP.
If the application is unreachable after activation, most [activation issues](/edge-proxy/faqs-and-troubleshooting) trace back to firewall rules blocking Gcore edge IPs, incomplete DNS propagation, or a protocol mismatch.