

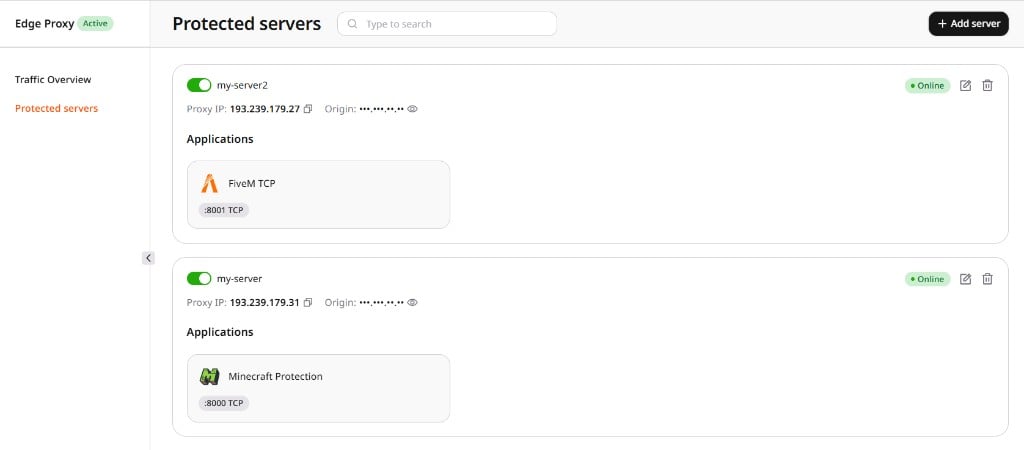
1
Enter server details
Fill in the fields: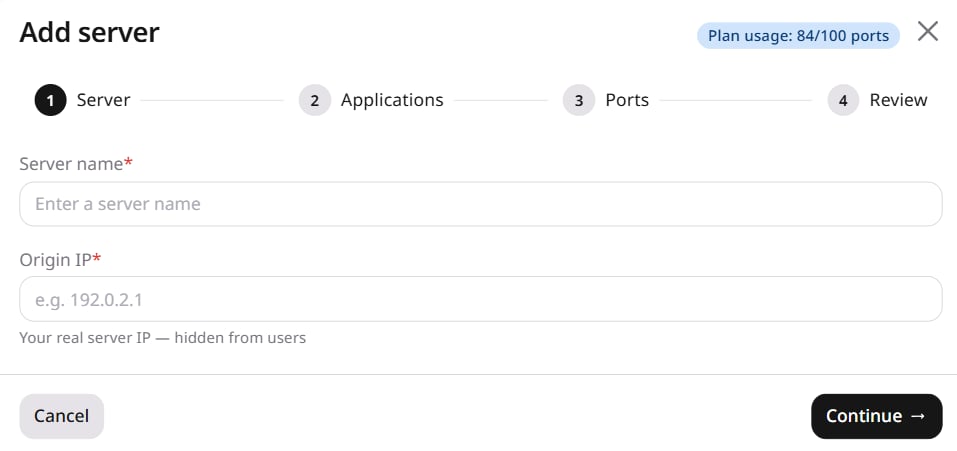
- Server name — A display label for this server. Example:
my-game-server-1. - Origin IP — The origin server’s public IPv4 address. Example:
195.14.50.0. Clients connect to the proxy IP instead of this address.
2
Select template and applications
Select the protection template and the application types this server runs.Protection template — determines which application profiles are available: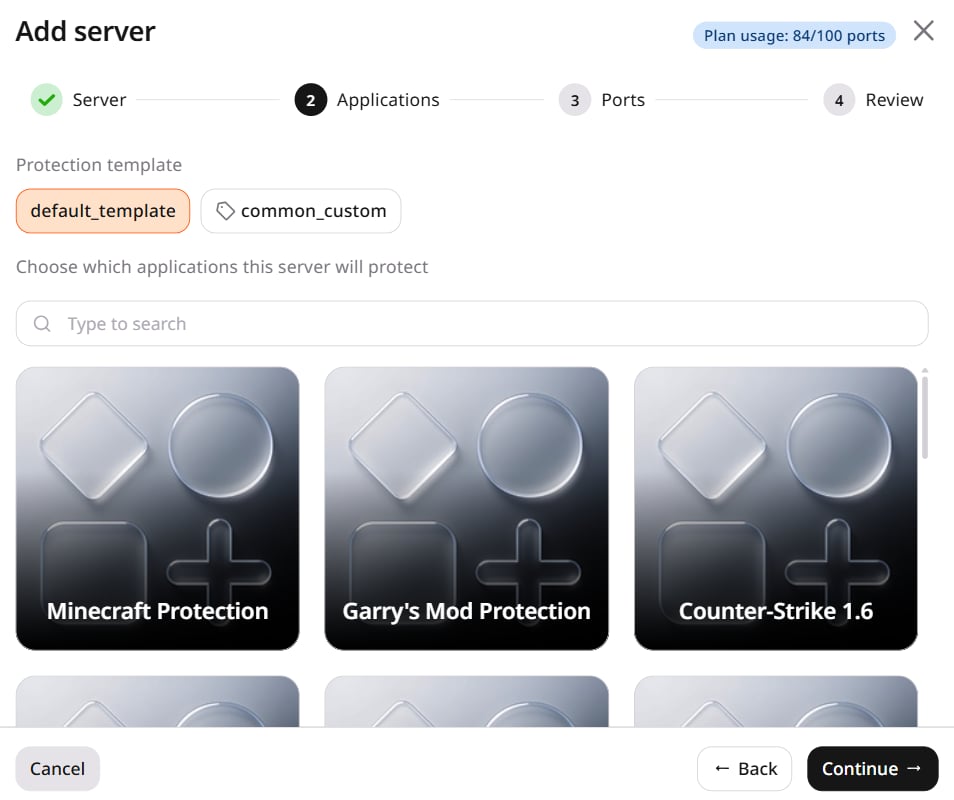
Applications — select each application type running on this server. Each entry corresponds to a DDoS filtering profile; the available options depend on the selected template.The plan usage counter in the wizard header tracks how many ports are consumed across all servers against the plan limit.
3
Set ports
For each selected application, enter the listening port (1–65535) and select the protocol: TCP or UDP. Click Add port to add more ports.Example: Minecraft Protection on port 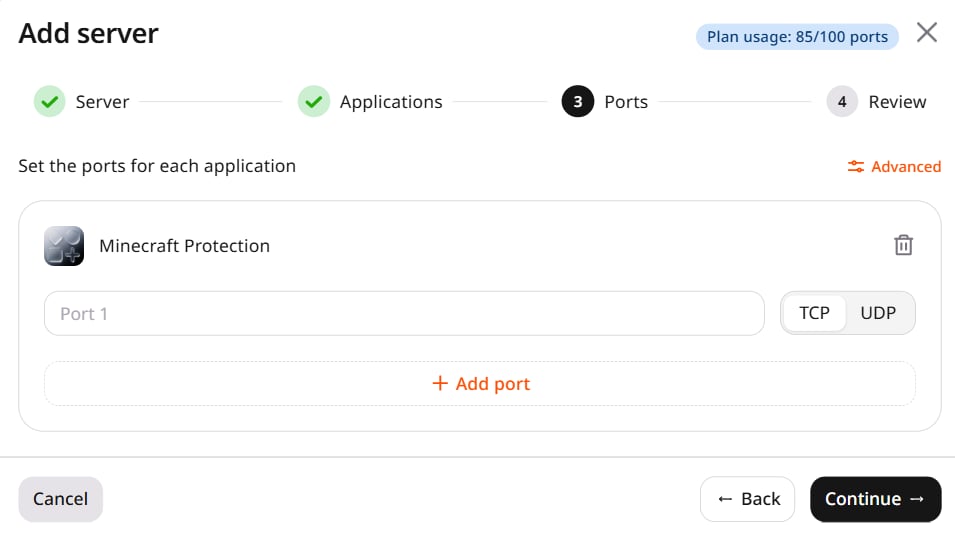
25565, protocol TCP.4
Review and deploy
Review the configuration and click Deploy. Activation takes about 3 minutes. Once complete, the server appears in the Protected servers list with Online status and an assigned proxy IP.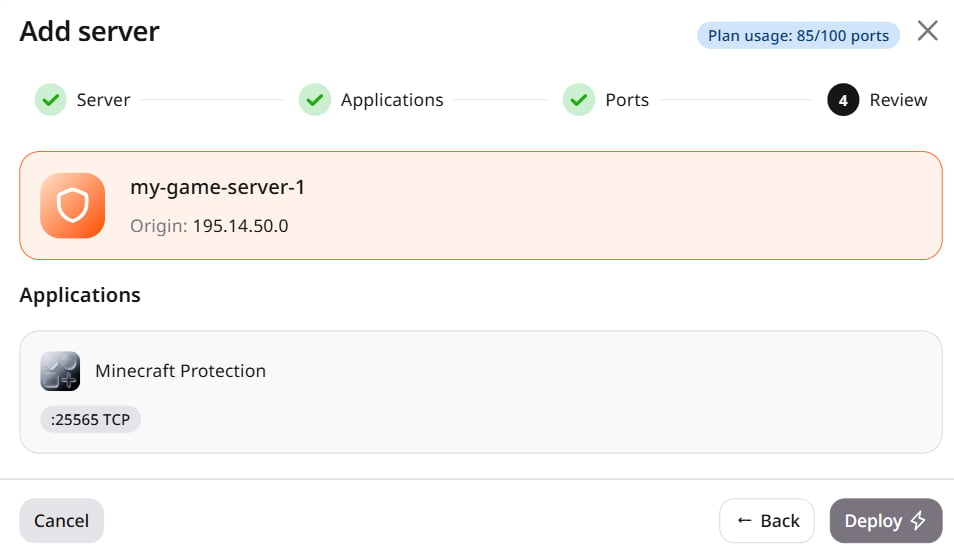
If the application is unreachable after activation, most activation issues trace back to firewall rules blocking Gcore edge IPs, incomplete DNS propagation, or a protocol mismatch.