

cdn.example.com). A certificate for *.example.com covers one DNS label under that domain (cdn.example.com). It does not cover the apex domain example.com or a nested hostname assets.cdn.example.com. Confirm that every required hostname appears in the certificate’s Subject Alternative Name (SAN) extension. Wildcard matching follows RFC 9525.
Upload the certificate in the Gcore Customer Portal, then attach it to an existing CDN resource, because custom SSL is not selected on the resource creation form.
Upload an SSL certificate
1
Open SSL certificates
In the Customer Portal, navigate to CDN > SSL certificates.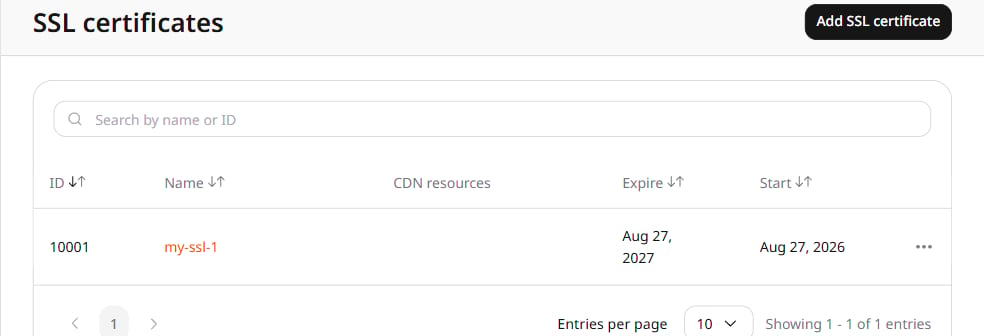
2
Open the create form
Click Add SSL certificate. The Create SSL Certificate form opens.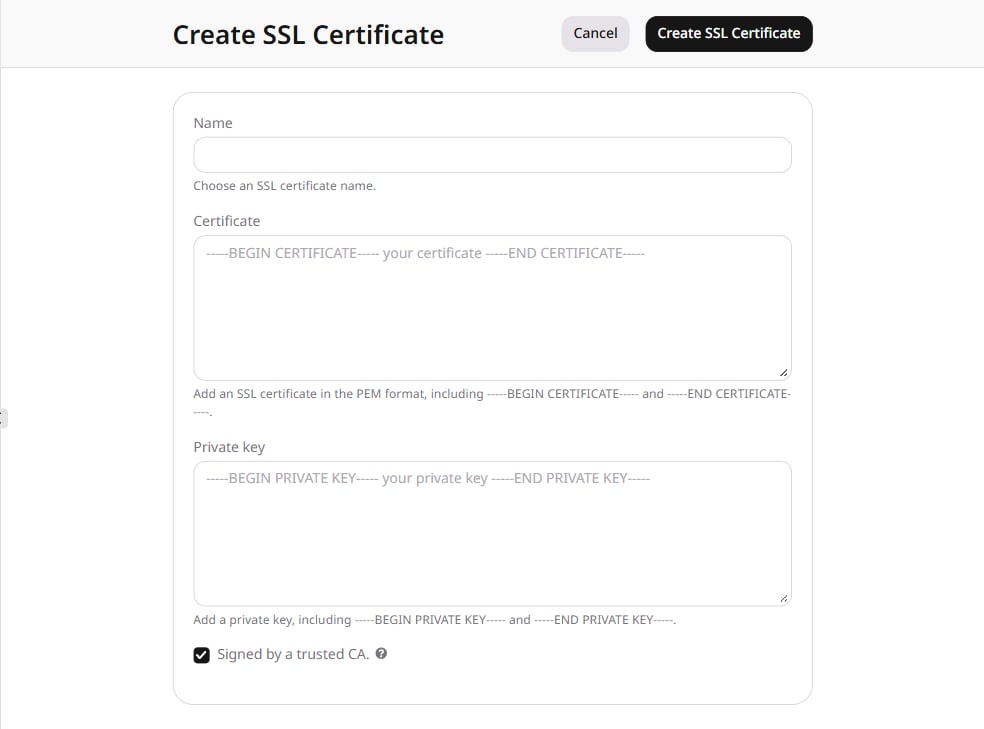
3
Enter the certificate data
Enter the values from the certificate authority: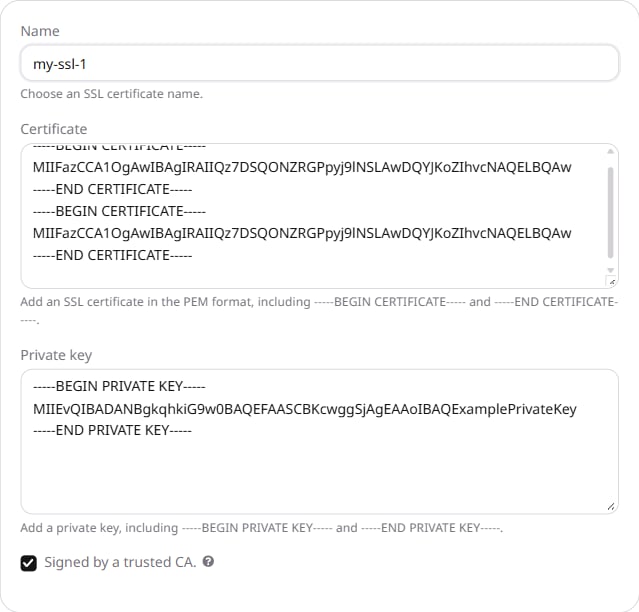
- Name: a label used only in the Customer Portal.
- Certificate: the certificate chain in PEM format (leaf certificate, intermediate CA, root CA).
- Private key: the matching private key.
4
Create the certificate
Click Create SSL Certificate. The certificate appears in the SSL certificates list.
Certificate chain and key
Open the certificate file in PEM format (.pem, .crt, or .cer) in a text editor.
Copy the chain in this order: leaf certificate, intermediate CA, root CA. Paste the full contents into Certificate, including the -----BEGIN CERTIFICATE----- and -----END CERTIFICATE----- tags. Do not leave blank lines between certificates.

.key) in a text editor. Paste the full contents into Private key, and keep the exact BEGIN and END lines from the key file. Common delimiters include -----BEGIN PRIVATE KEY----- and -----BEGIN RSA PRIVATE KEY-----.
SSL certificate on a CDN resource
Create the CDN resource first. On the create form, enter the hostname in Add domain. After the resource exists, attach the custom certificate in the resource SSL settings.1
Open the CDN resource
In the Customer Portal, navigate to CDN > CDN resources and click the resource CNAME.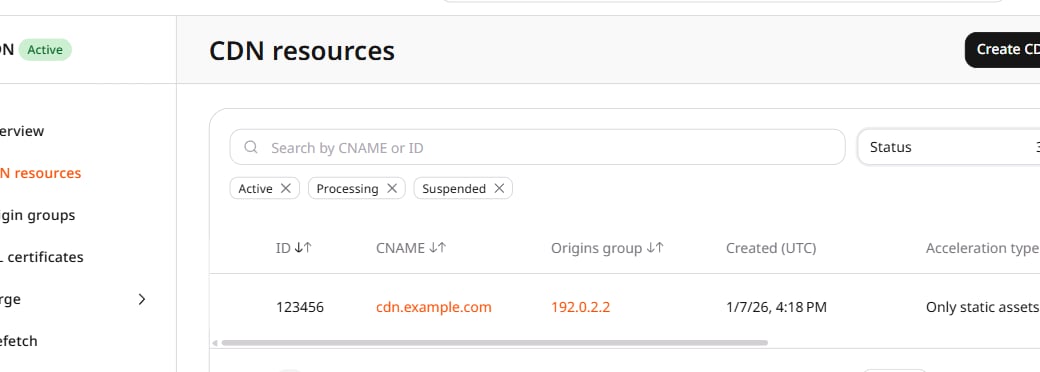
2
Open SSL settings
On the OPTIONS tab, open SSL under General.
3
Select the custom certificate
Turn on Enable HTTPS and select Custom SSL certificate. If a certificate is already uploaded, select it in the certificate dropdown. If none are uploaded, click Add SSL certificate.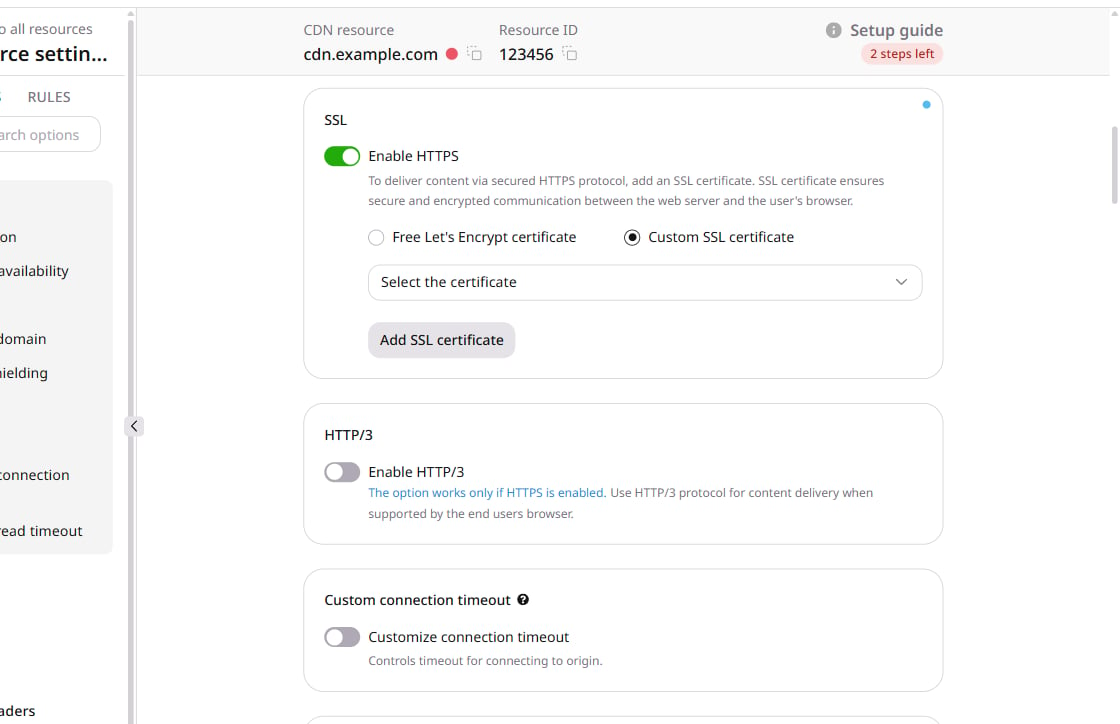
Certificate not uploaded yet
Certificate not uploaded yet
Click Add SSL certificate, paste the chain and key in the dialog, then click Add SSL certificate. The paste rules match Certificate chain.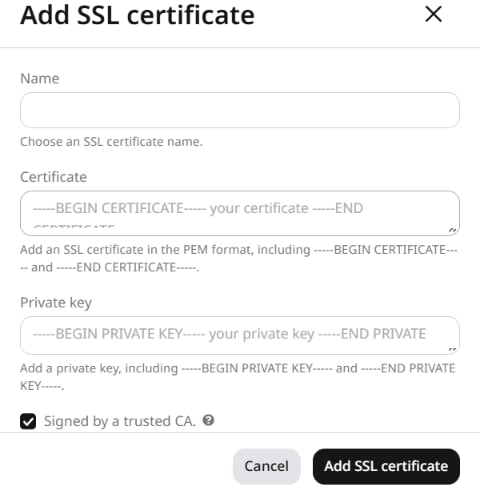
4
Save the SSL settings
Click Save changes.
Certificate management
Uploaded certificates are listed under CDN > SSL certificates. The table shows ID, name, connected CDN resources, start date, and expiration date.SSL certificate renewal
Before expiration, upload a replacement certificate and select it on every resource listed under CDN resources for the old certificate.1
Upload a replacement certificate
Add the replacement in SSL certificates. Do not delete the old certificate yet.
2
Replace it on every connected resource
On the old certificate row, note every resource under CDN resources. For each listed resource, open SSL settings, select the new certificate, and click Save changes.
3
Wait for HTTPS to use the new certificate
Wait at least 15 minutes after the last resource is saved.
4
Verify each hostname
For each hostname on the connected resources, open the site over HTTPS, click the lock icon, open Connection is secure, then Certificate is valid. Compare the displayed data with the new certificate.
5
Delete the old certificate
After every hostname matches the new certificate, delete the old certificate. Removing it earlier interrupts HTTPS delivery on any resource that still selects it.
Expiration notifications
Notification emails are sent to the administrator and engineer addresses 14 days before expiration, seven days before expiration, and on the expiration date. A reminder also appears on login during those 14 days and after expiration. SSL certificates in the side panel shows an exclamation mark when a certificate is expired or will expire within 14 days. A red exclamation mark marks an expired certificate, while a yellow warning marks a certificate that expires in 14 days or fewer.Delete an SSL certificate
A certificate that is selected on a CDN resource cannot be deleted. Replace it on every connected resource first.1
Detach the certificate from every resource
On the certificate row, note every resource under CDN resources. For each listed resource, open SSL settings and select a replacement certificate, then click Save changes. Turn off Enable HTTPS only when HTTPS delivery is being removed from that resource.
2
Open the delete action
Click the three dots next to the certificate, then click Delete. The same menu includes Settings.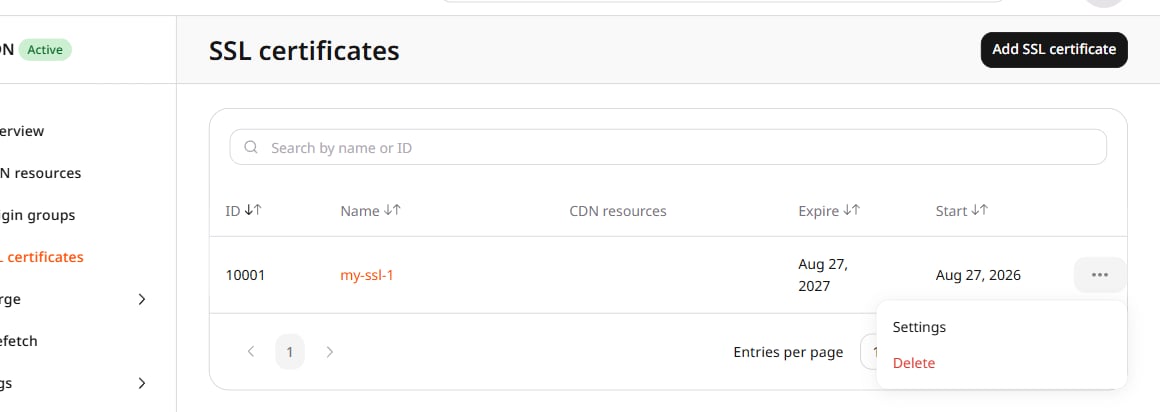
3
Confirm deletion
In the confirmation dialog, click Yes, delete.