- High (95%)
- Medium (80%)
- Low (65%)
- Custom value (50%)




Enable quality
Quality is included in the paid Image Stack option. To use it, enable Image Stack for the CDN resource following the Enable Image stack guide.Use quality
Quality can be configured in two ways: via the Gcore Customer Portal to apply a default level to all images matching the rule, or via query parameters to set quality per individual image URL.Use quality in the customer portal
1
Open the Image optimization rule
Navigate to the settings of the required CDN resource. Click the Rules tab, then open the Image optimization rule.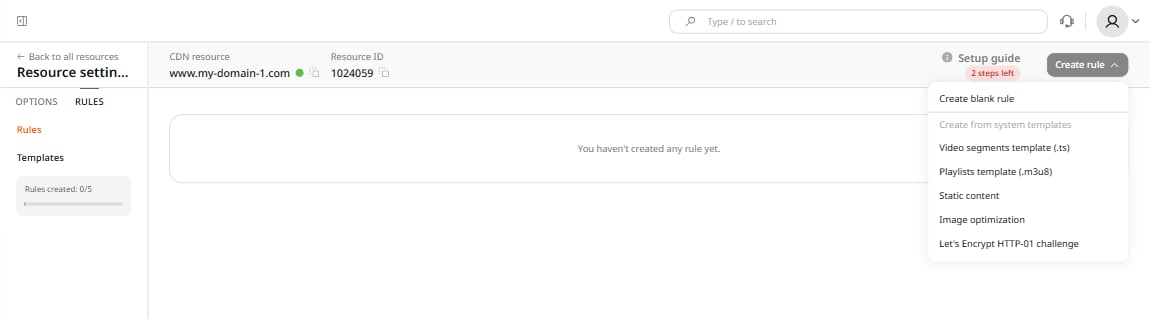
2
Select the quality level
In the Image Stack section, select one of the built-in presets: High (95%), Medium (80%), Low (65%), or Custom value. The default is High (95%).To prevent quality reduction for PNG images, enable Enable lossless for PNG. When enabled, the quality setting applies only to JPG images.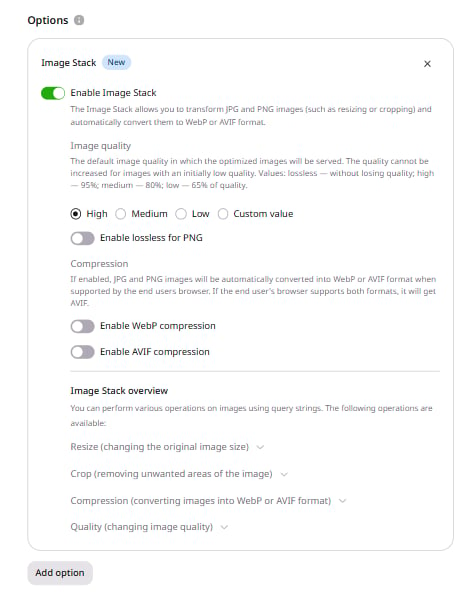
The quality value cannot exceed 100%.
3
Save the rule
Click Save changes at the top right corner of the page.
Use quality via query parameters
Query parameters set quality for individual images by modifying the URL in the website source. 1. Open the website source code. 2. Find the URLs of the images whose quality needs to change. 3. Add thequality query parameter to each URL alongside at least one other Image Stack parameter:
valueis a number between 1 and 100tool2=value2represents query parameters for any other Image Stack function such as Compression, Resize, or Crop
quality and fmt parameter combinations:
- Before
- After WebP compression
- After AVIF compression 50%
- After AVIF compression 10%
- Link: img.jpg
- Size: 813 KB
- Quality: 100%




Check HTTP headers
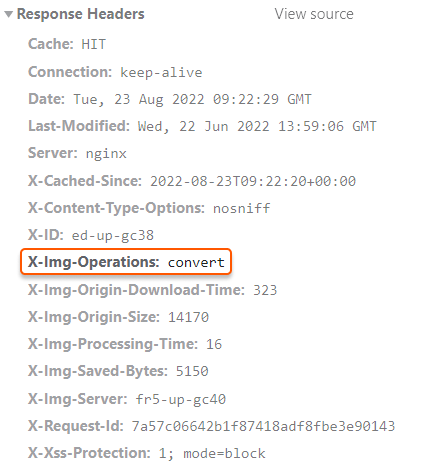
After processing, the image URL and file extension remain unchanged. Use the HTTP response headers to verify that quality conversion was applied. TheX-Img-Operations header lists all conversions performed. If the value includes convert, the image quality was changed.
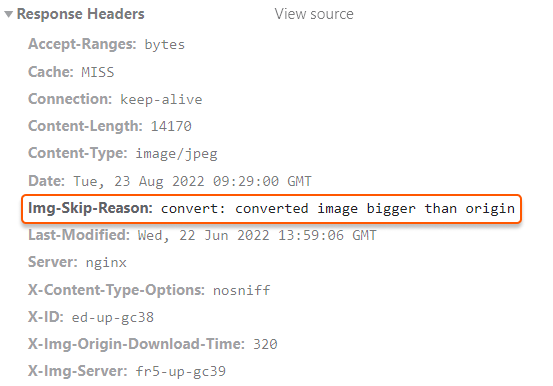
X-Img-Operations does not contain convert and the CDN returns the original-quality image, check the Img-Skip-Reason header. It explains why the operation was skipped — for example, converted image bigger than origin appears when the configured quality value is higher than the original image quality. In this case, combine Quality with another Image Stack feature.